Getting Started
This guide walks through installing MetaWeaver, enabling definition sets, and using the single‑asset and bulk editors.
Requirements
- Unreal Engine 5.6+
- Editor‑only plugin (no runtime modules)
Install
- Copy the
MetaWeaverdirectory into your project’sPlugins/folder. - Restart the editor. Ensure the MetaWeaver plugin is enabled.
Configure
-
Create one or more
UMetaWeaverMetadataDefinitionSetassets to define your metadata schema.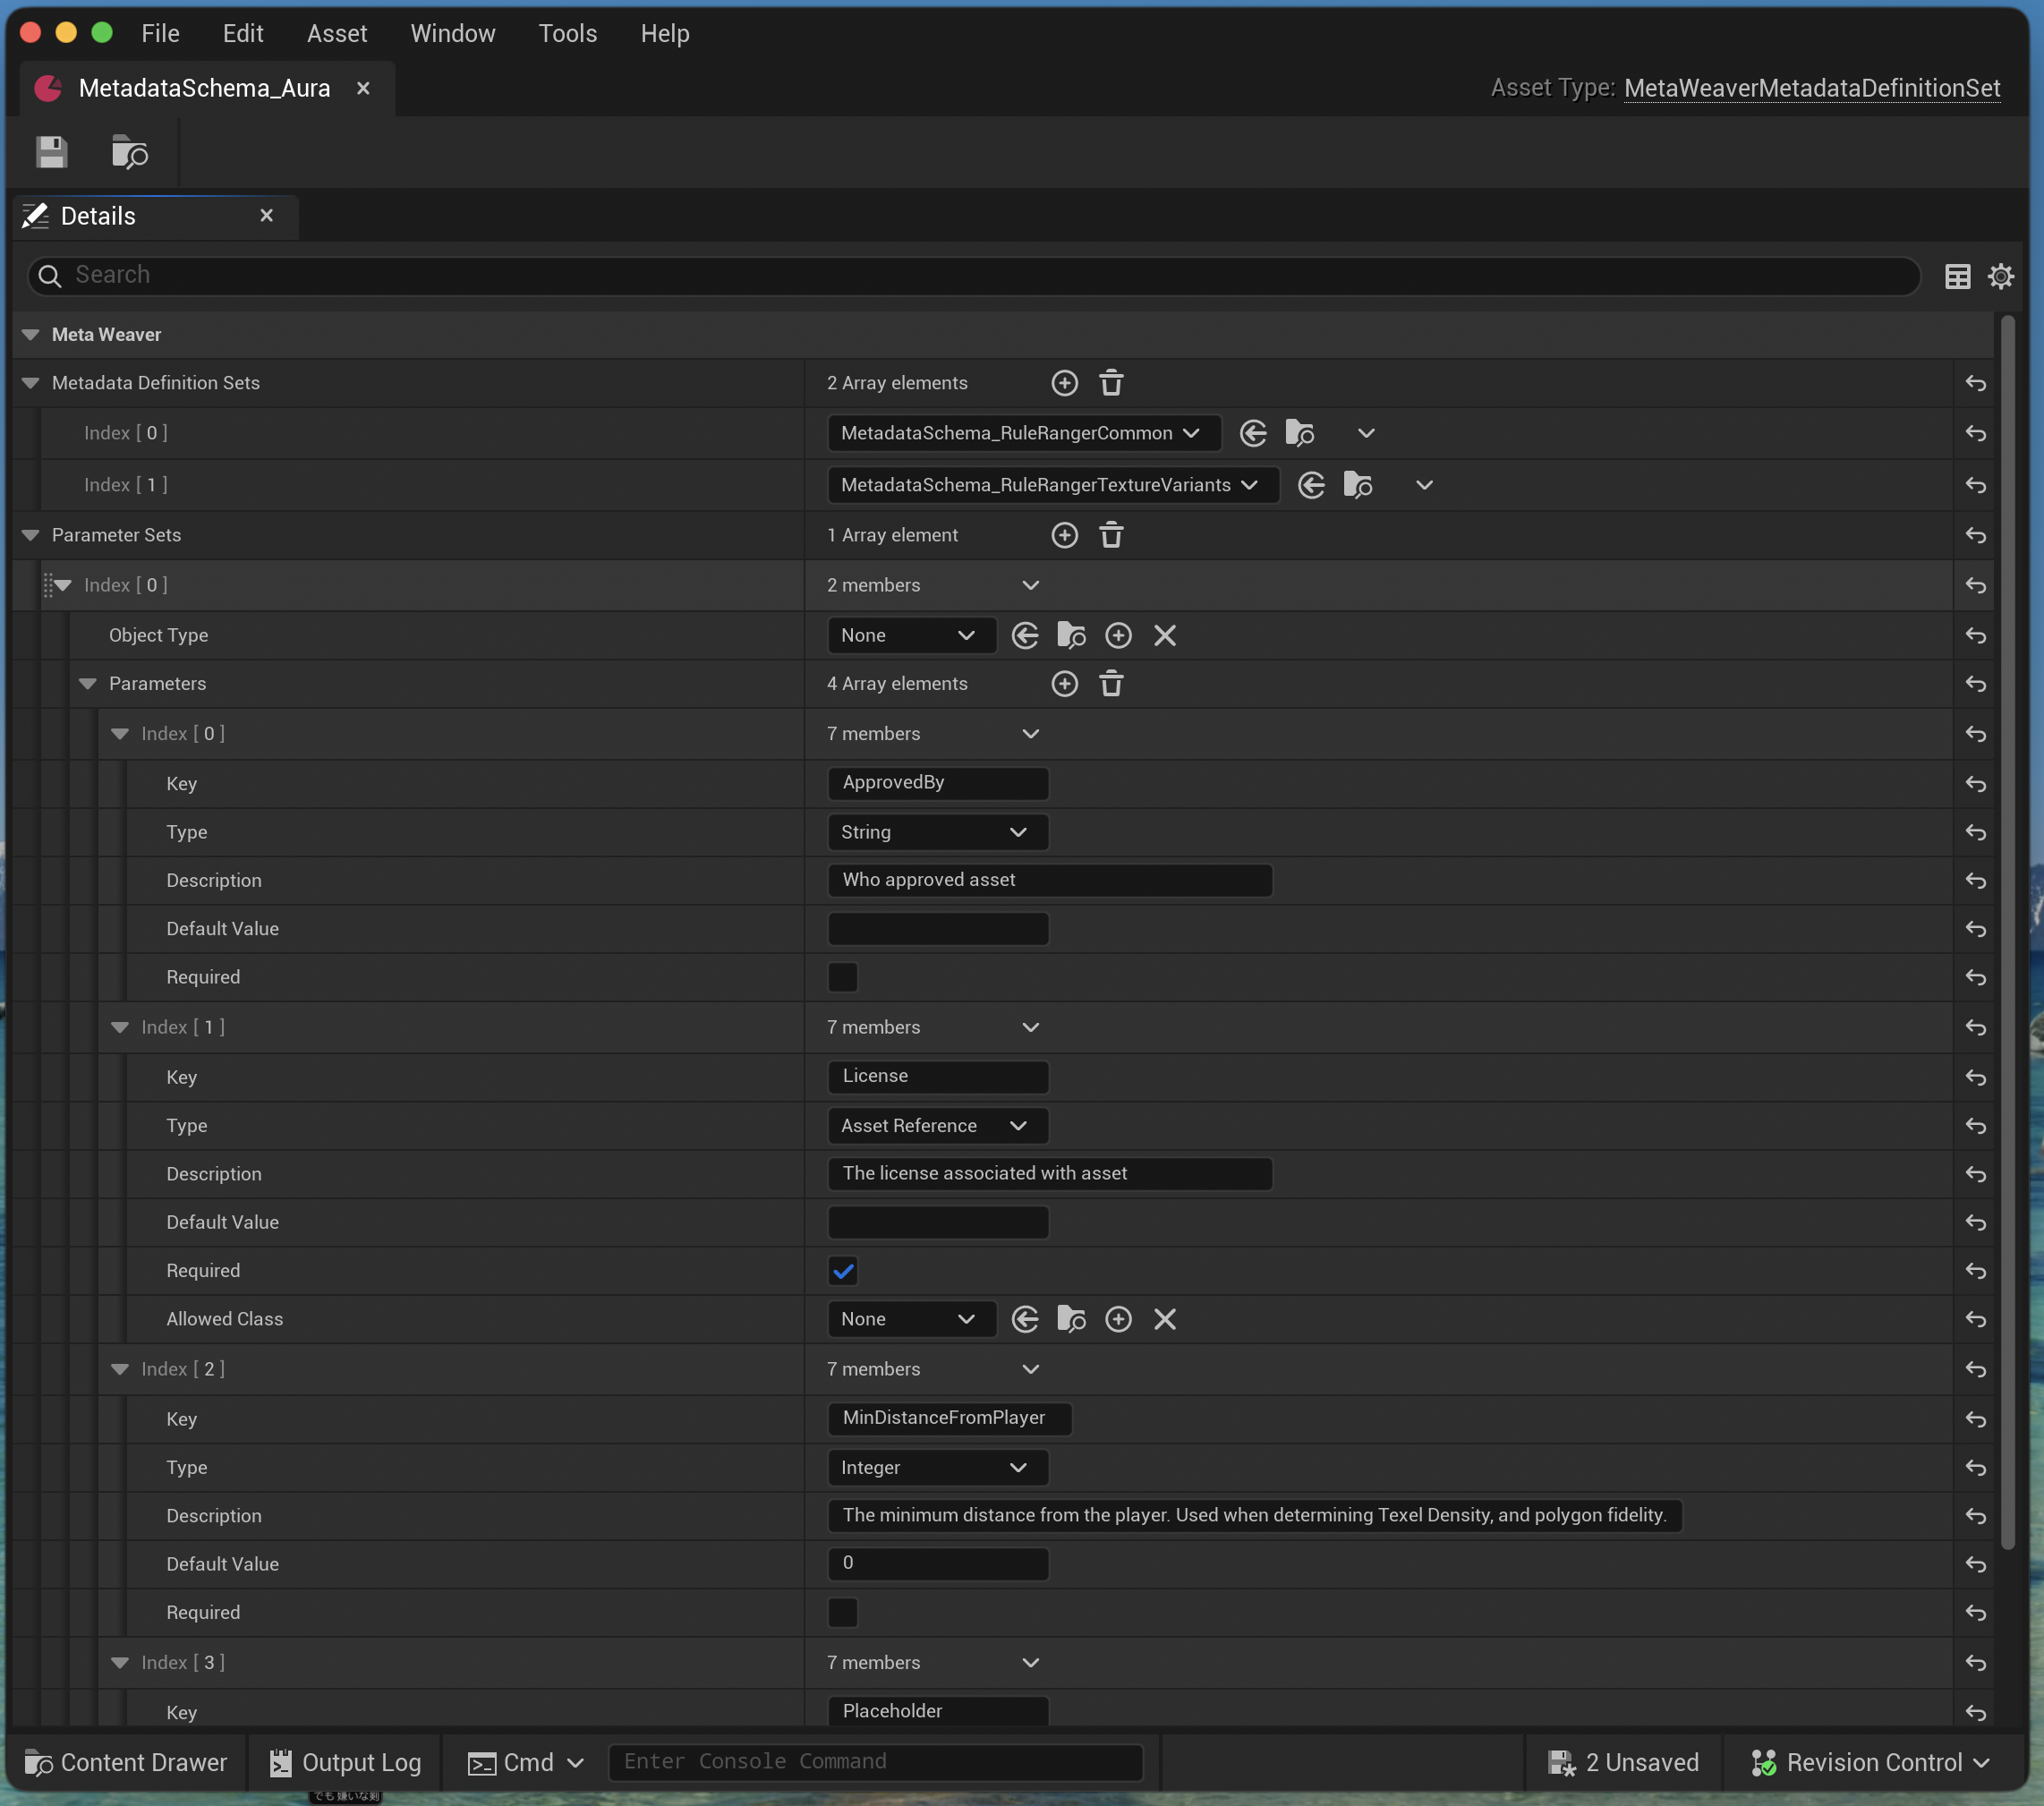
A MetaWeaverMetadataDefinitionSet asset that defines metadata schema for the project
-
Open
Project Settings → MetaWeaver → Active Definition Setsand add one or moreUMetaWeaverMetadataDefinitionSetassets.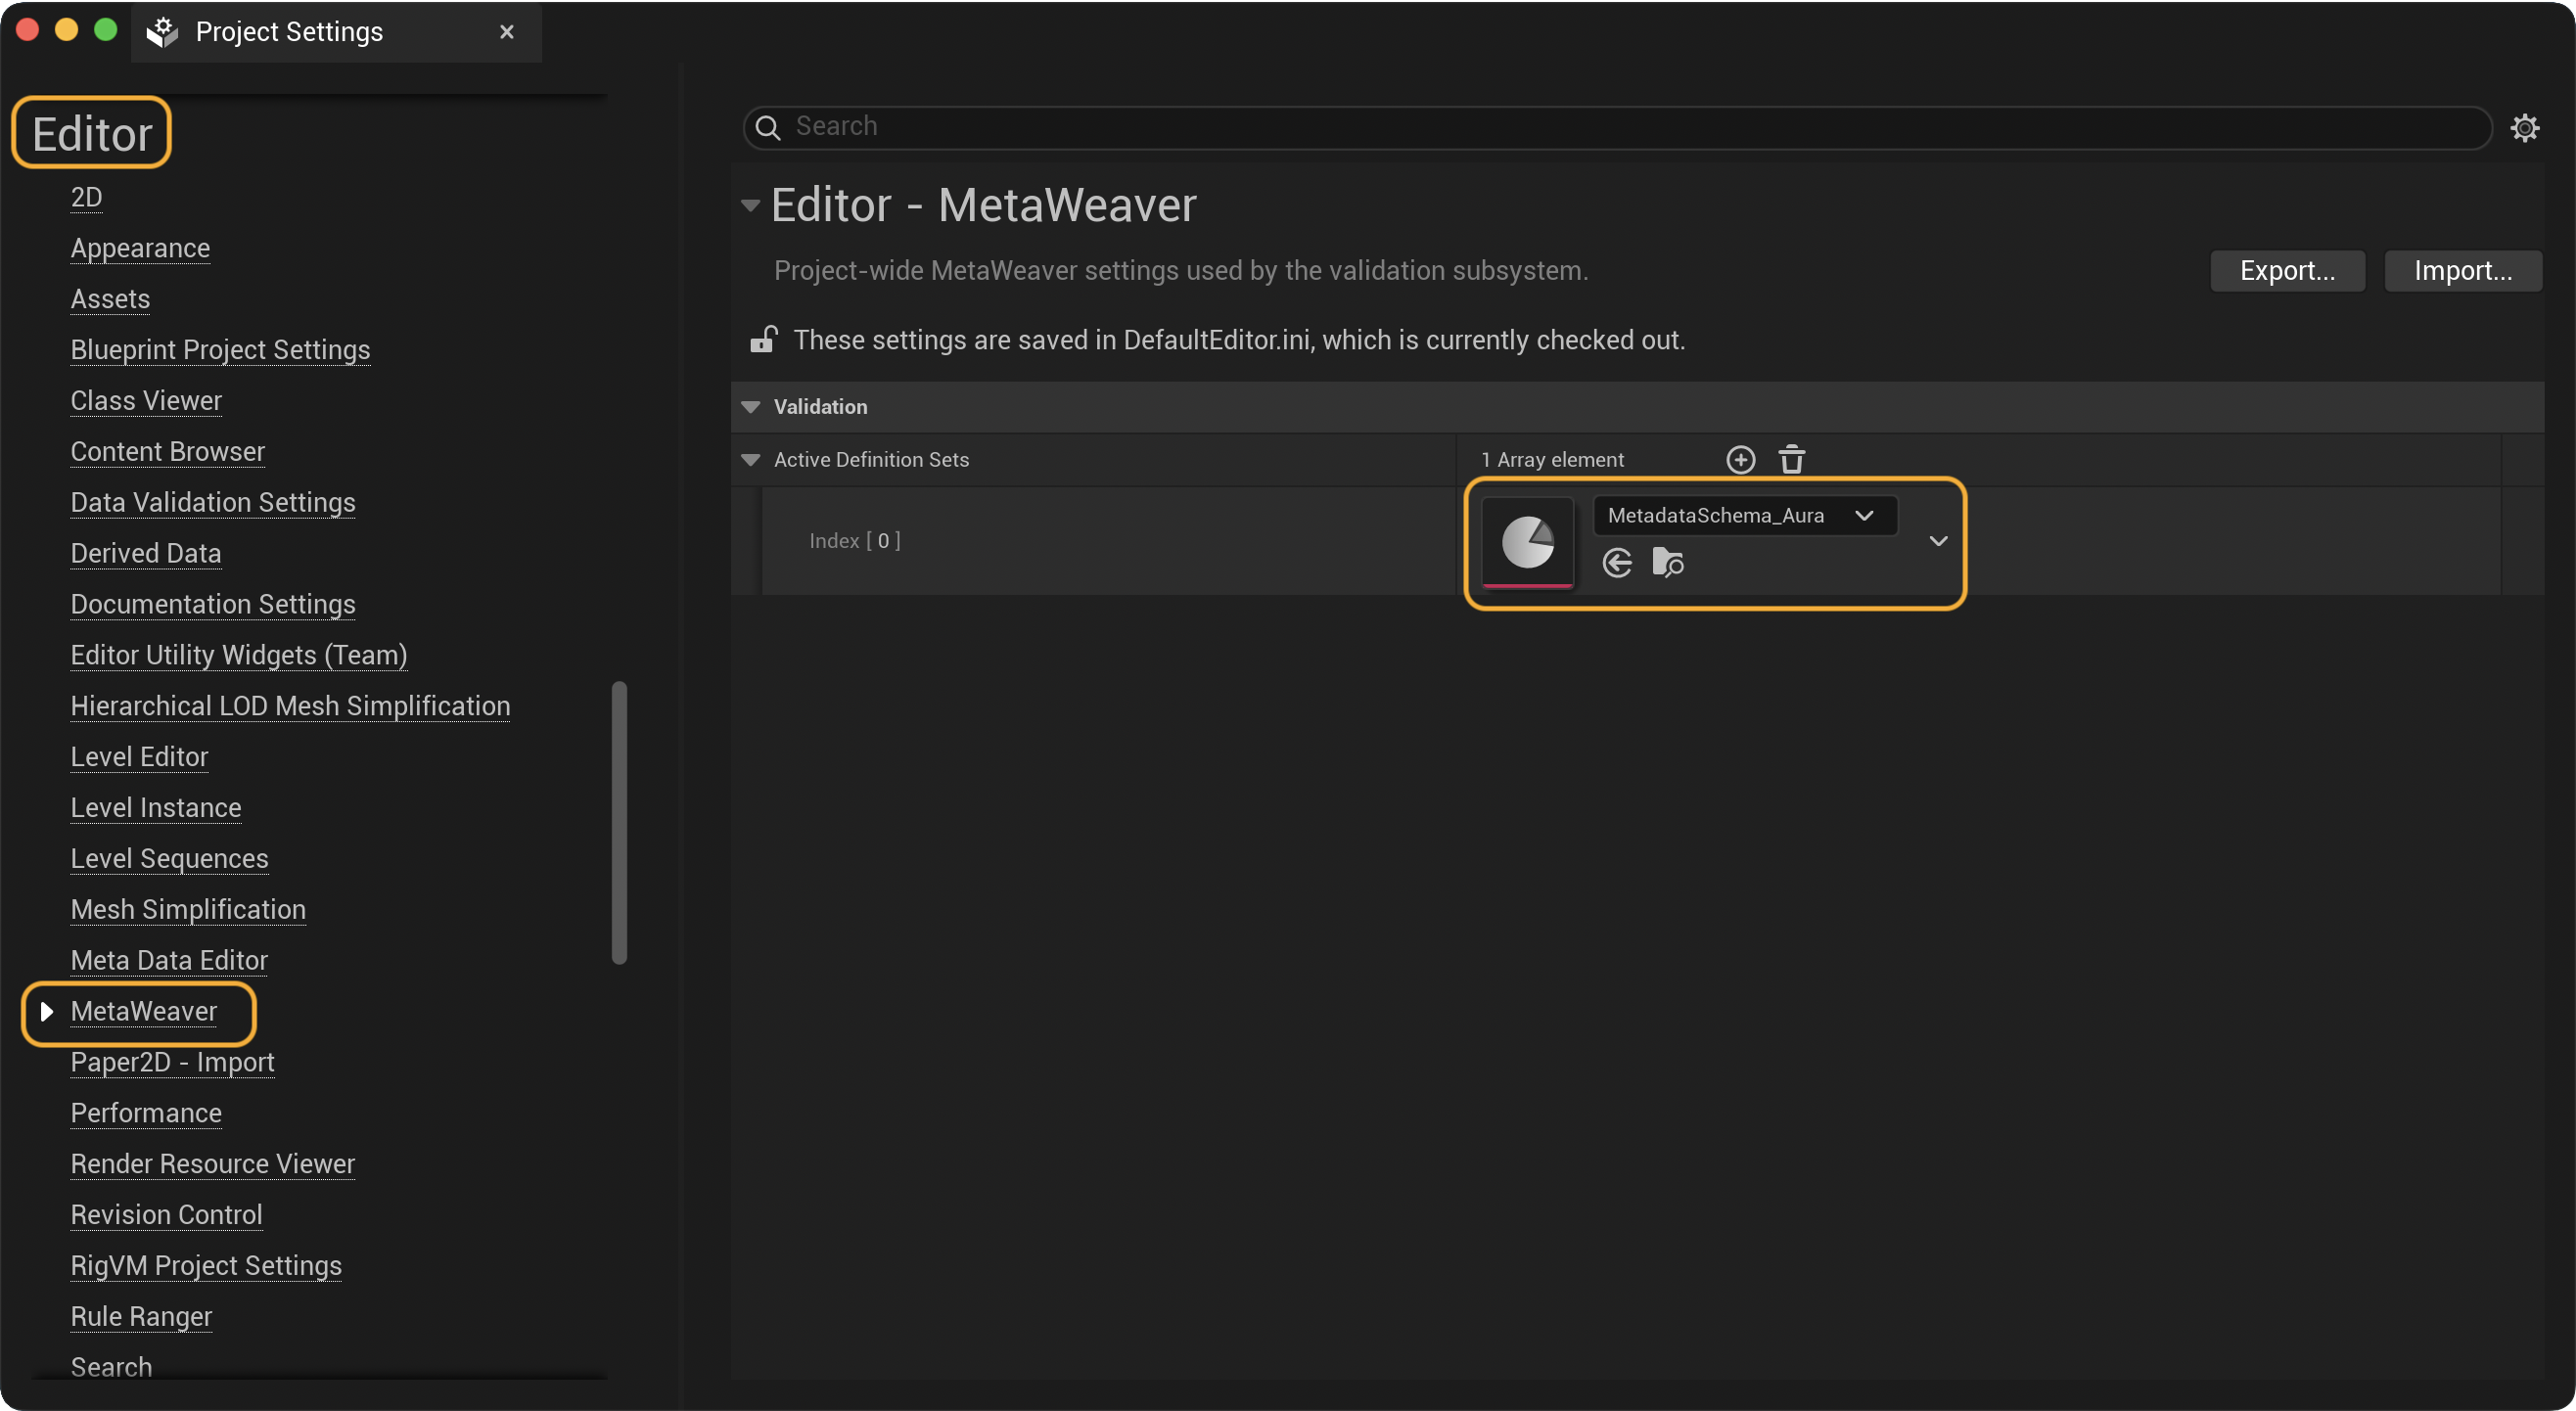
Project Settings → MetaWeaver: add schema asset to “Active Definition Sets”.
Single‑Asset Editing
-
In the Content Browser, right‑click an asset → Asset Actions → Edit Metadata…
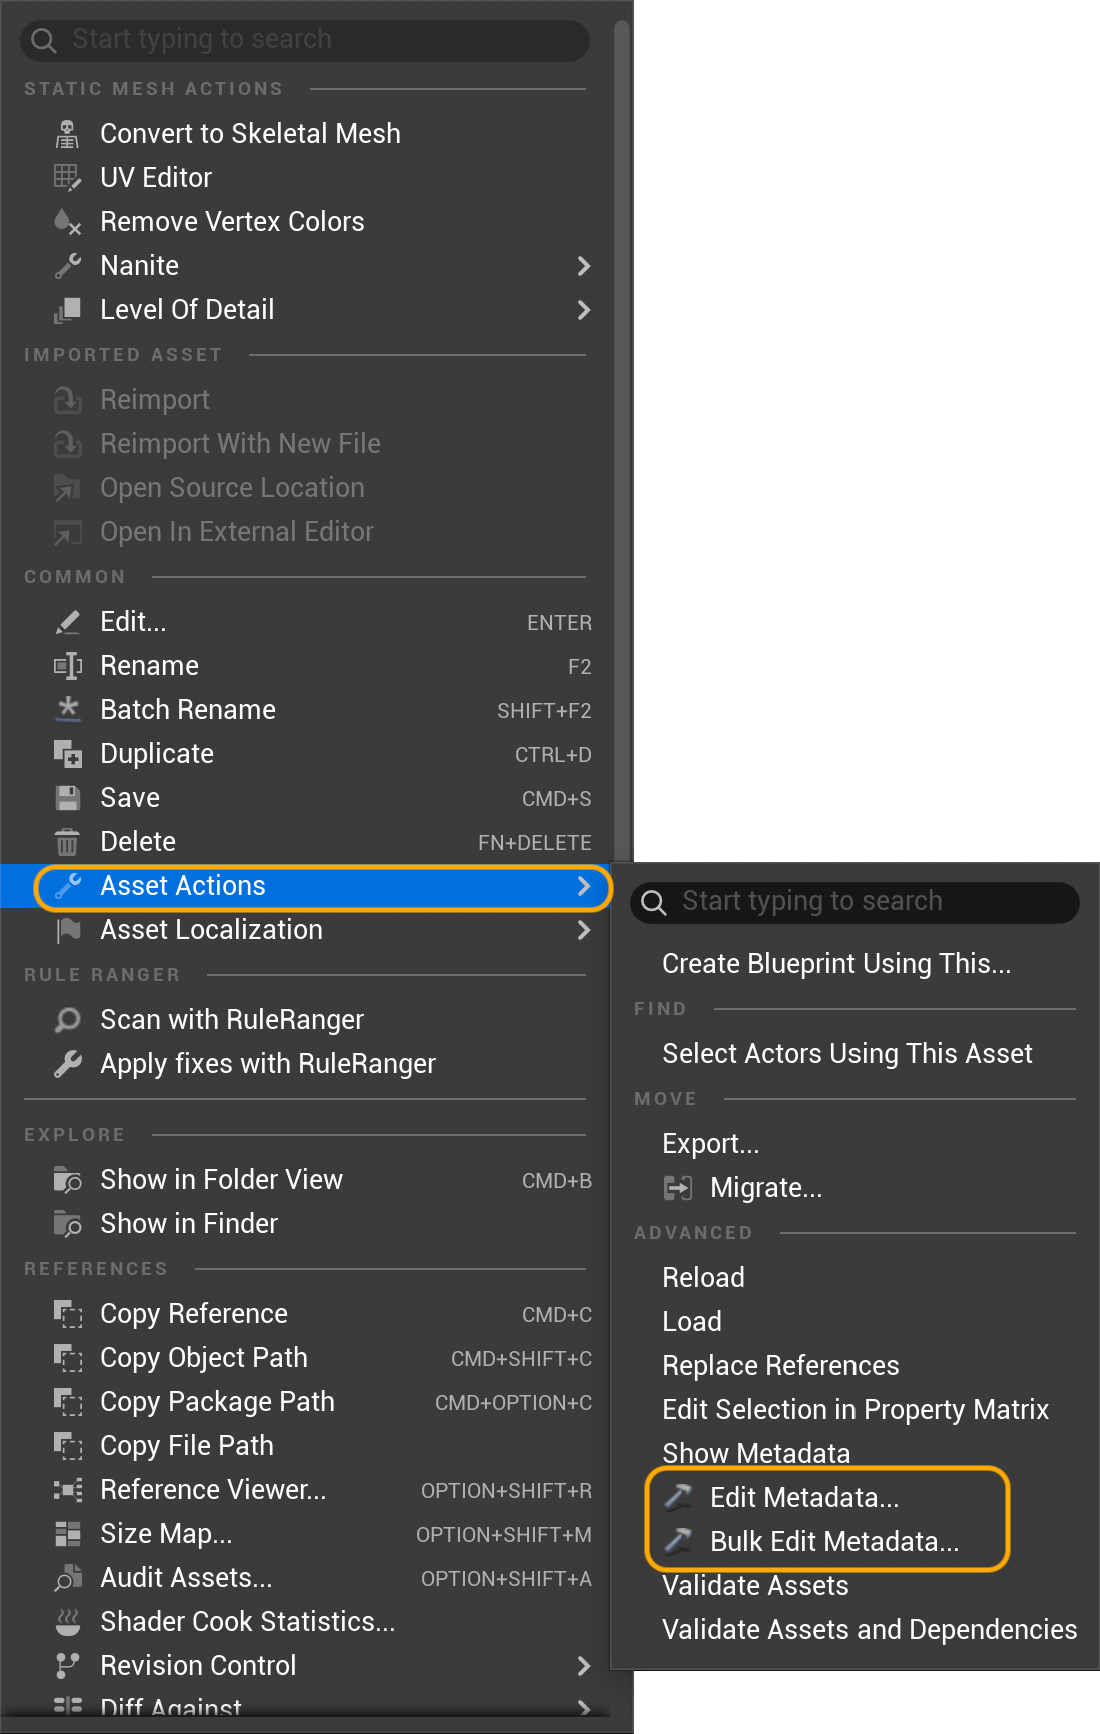
Content Browser → Asset Actions -
Edit values using typed controls (Bool, Int, Float, String, Enum, Asset Reference).
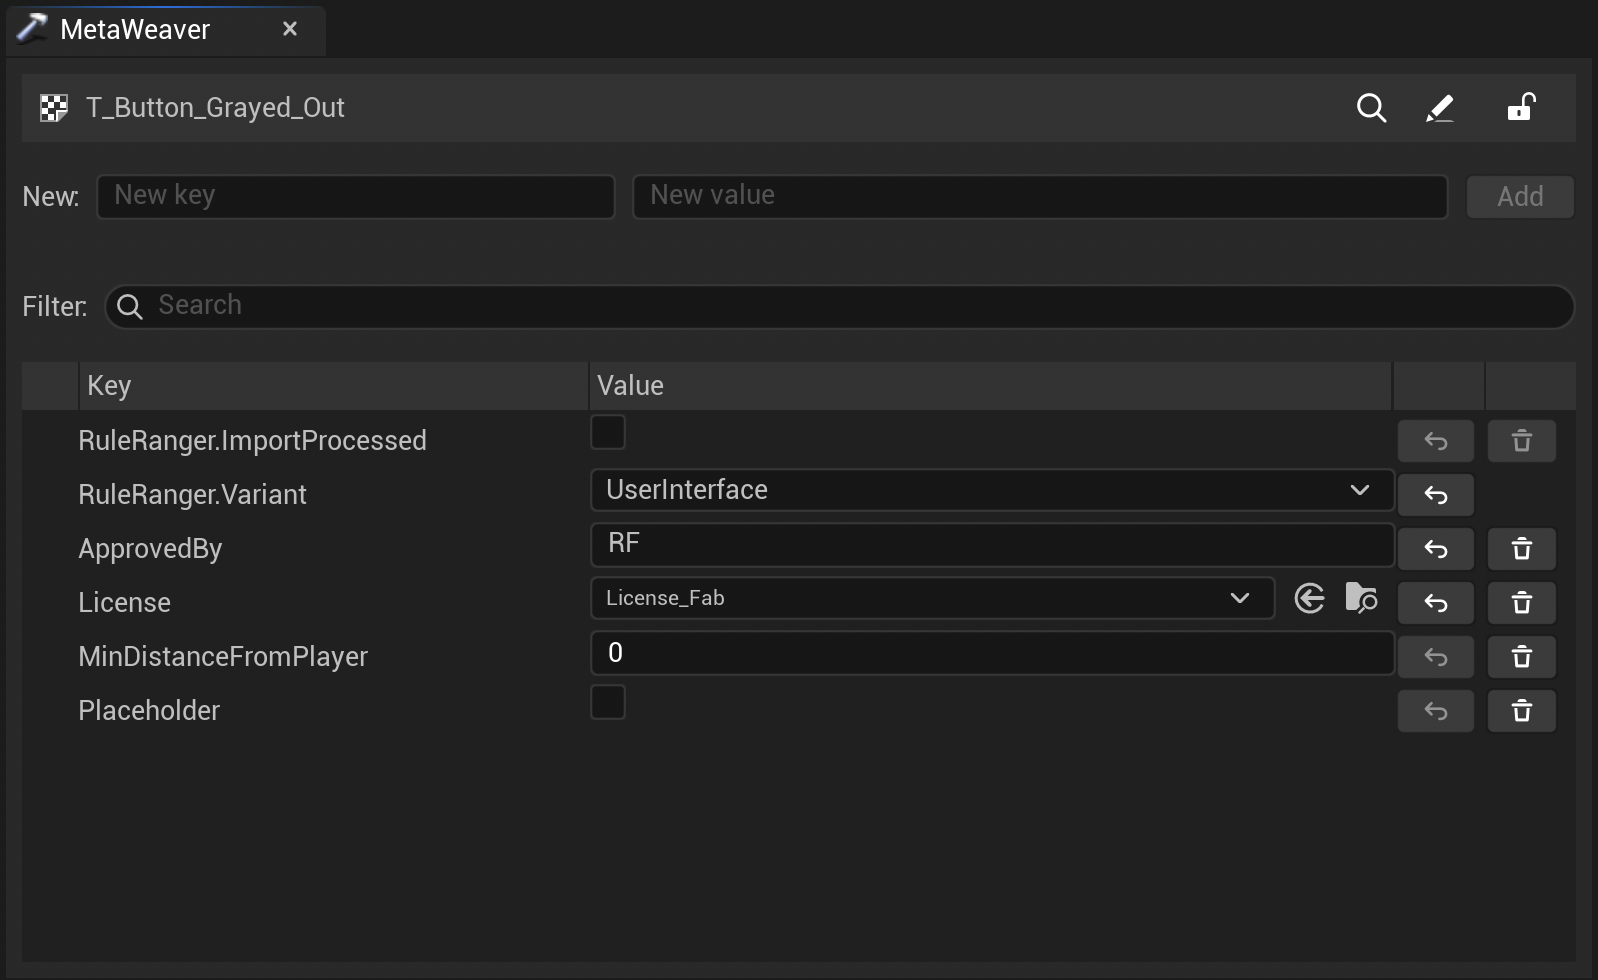
Single‑asset editor with typed controls and row actions (Show/Open) -
Inline validation flags missing/invalid values.
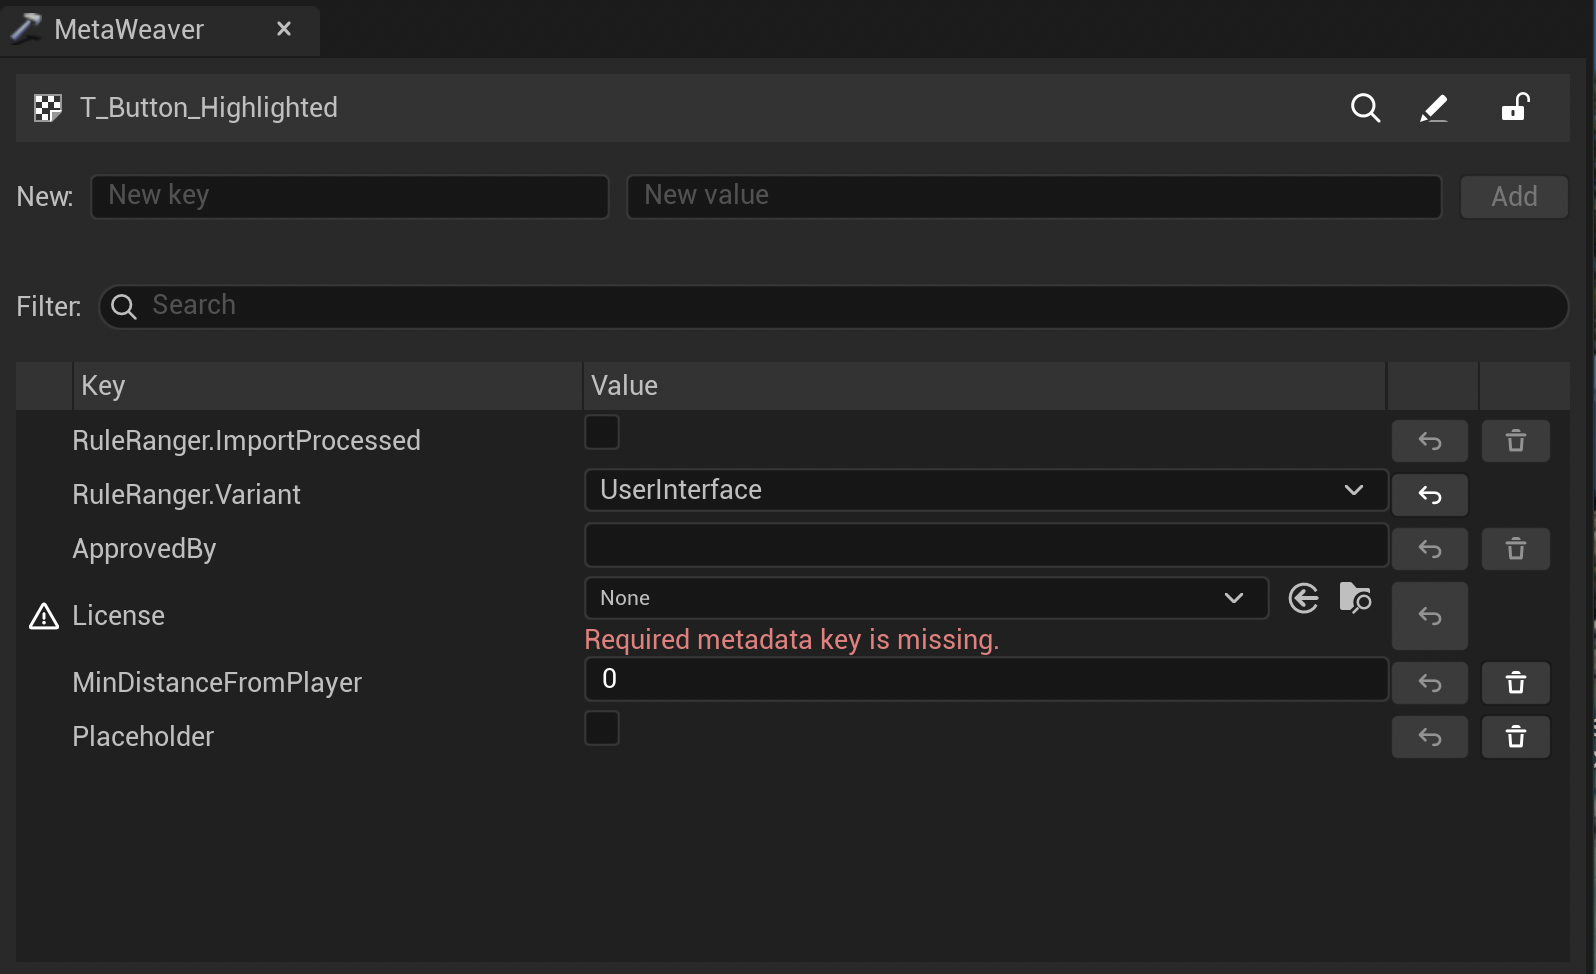
Inline validation feedback
Bulk Editing (Matrix)
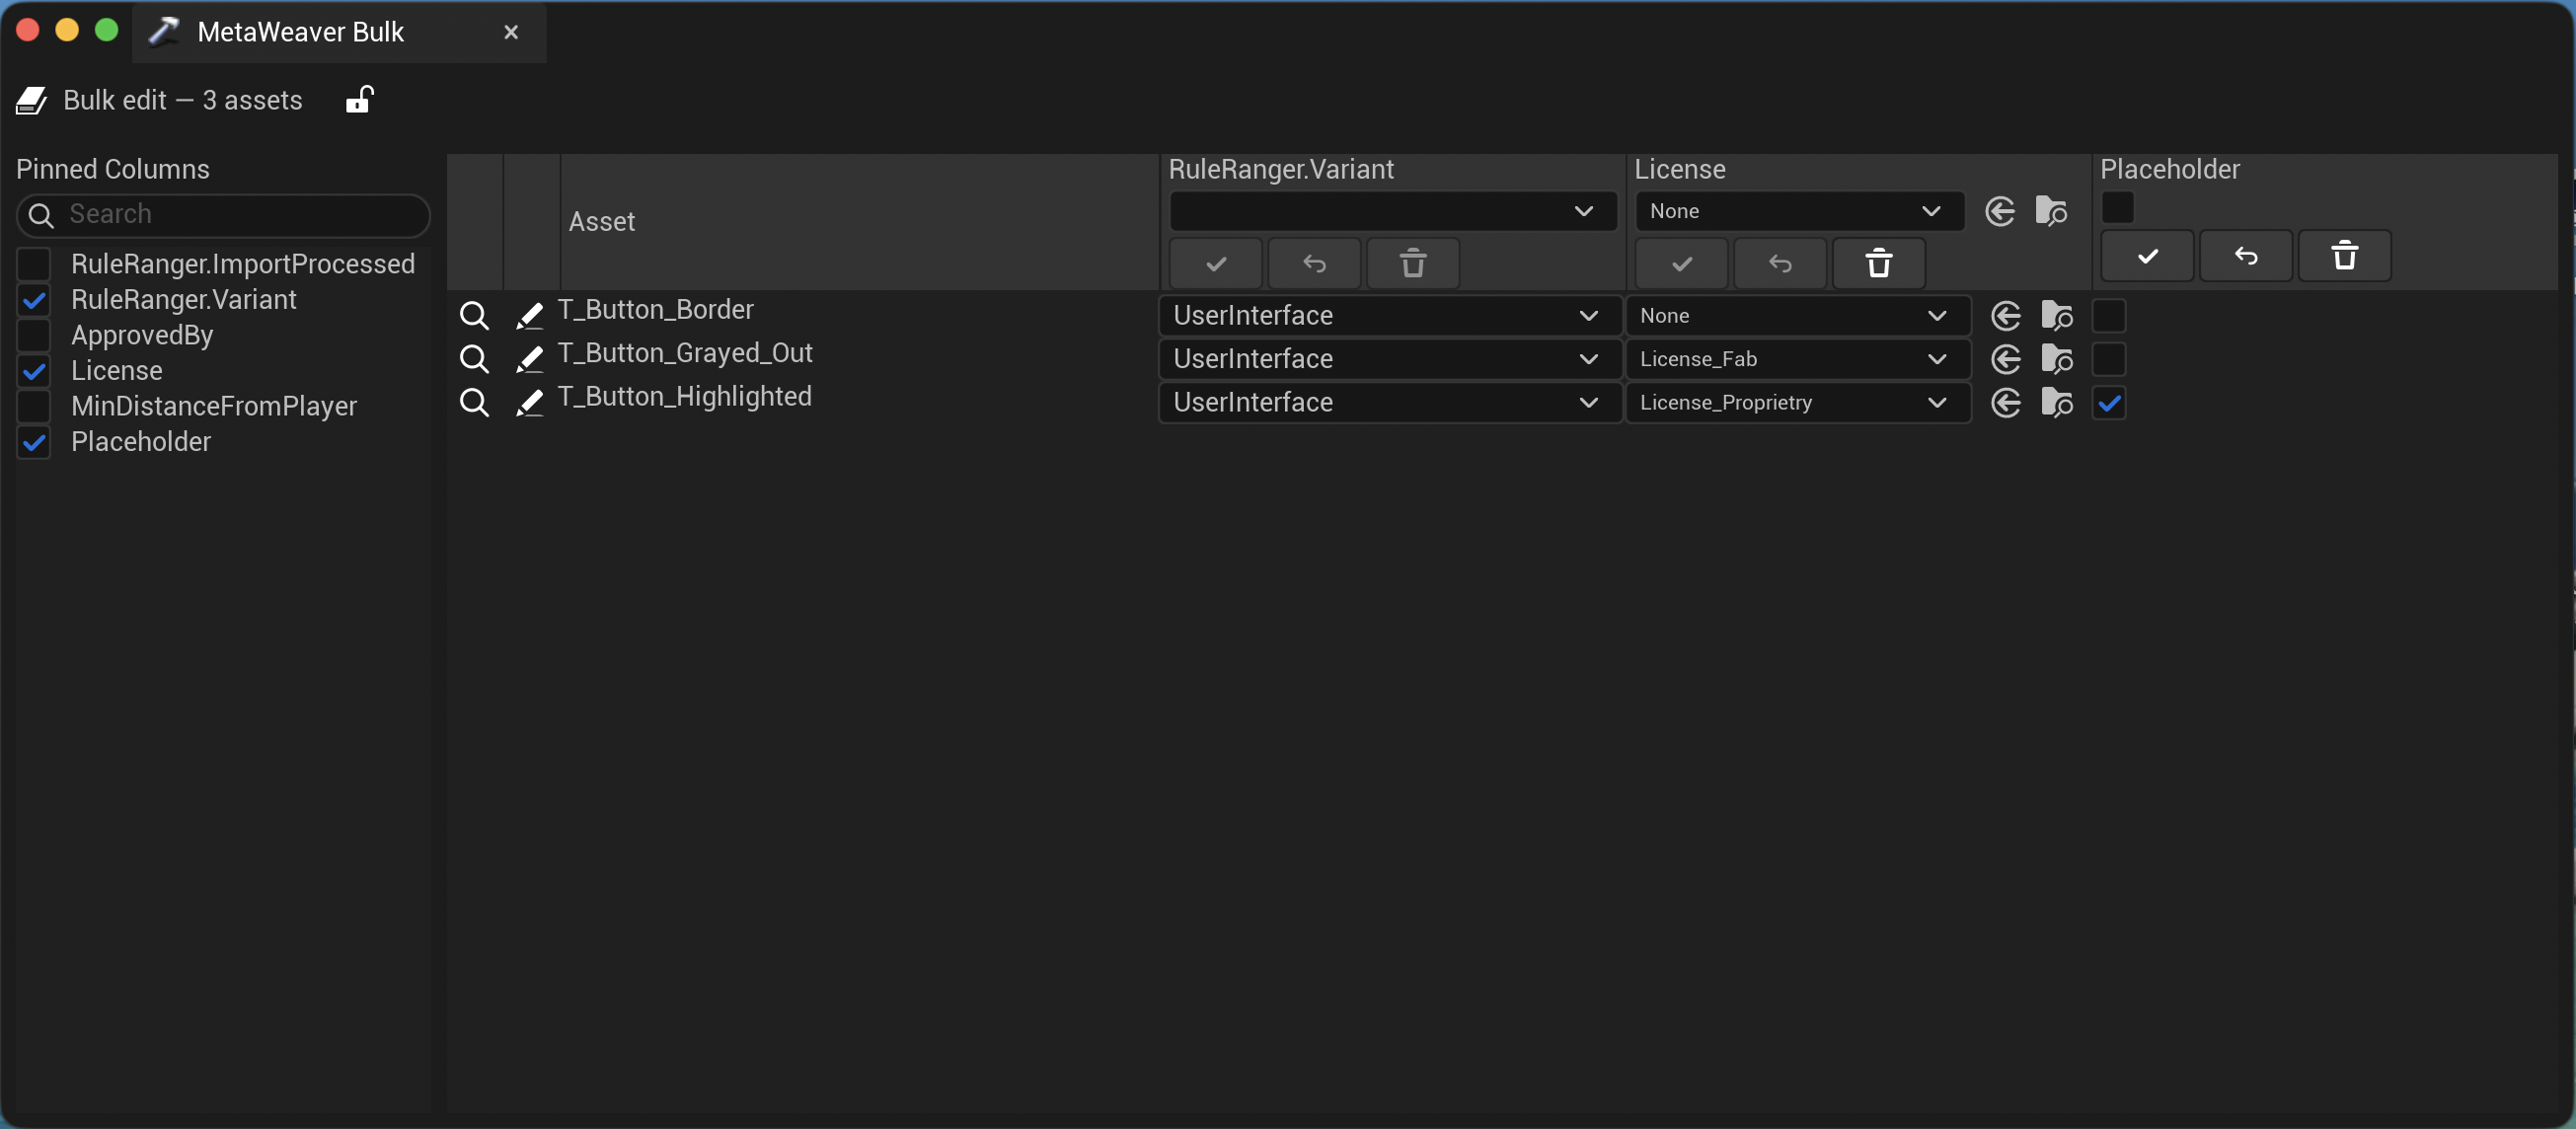
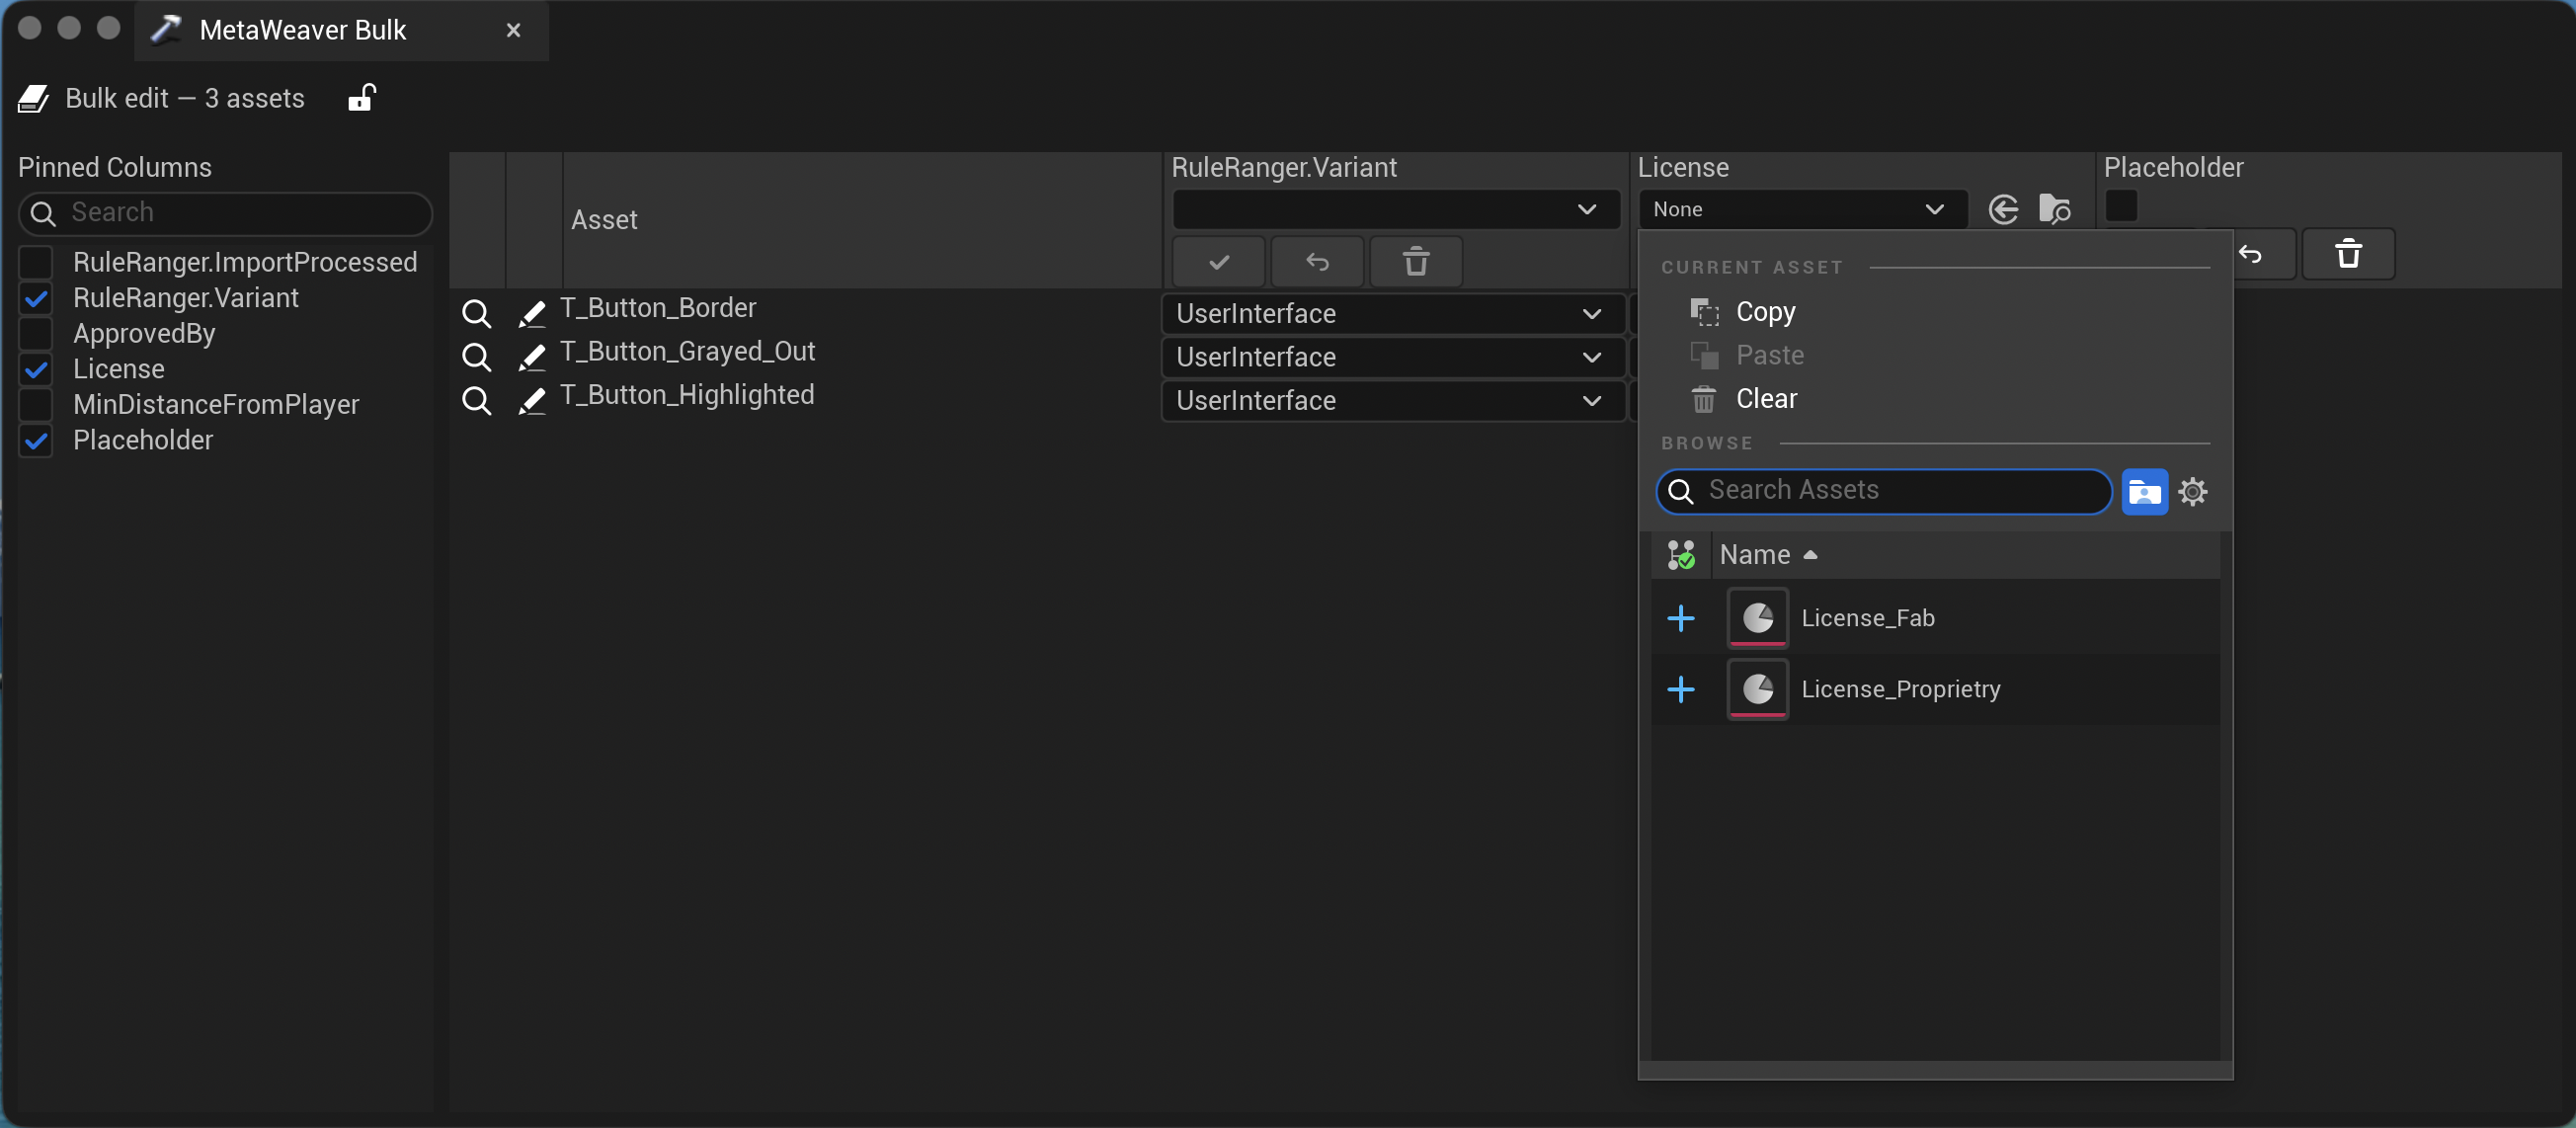
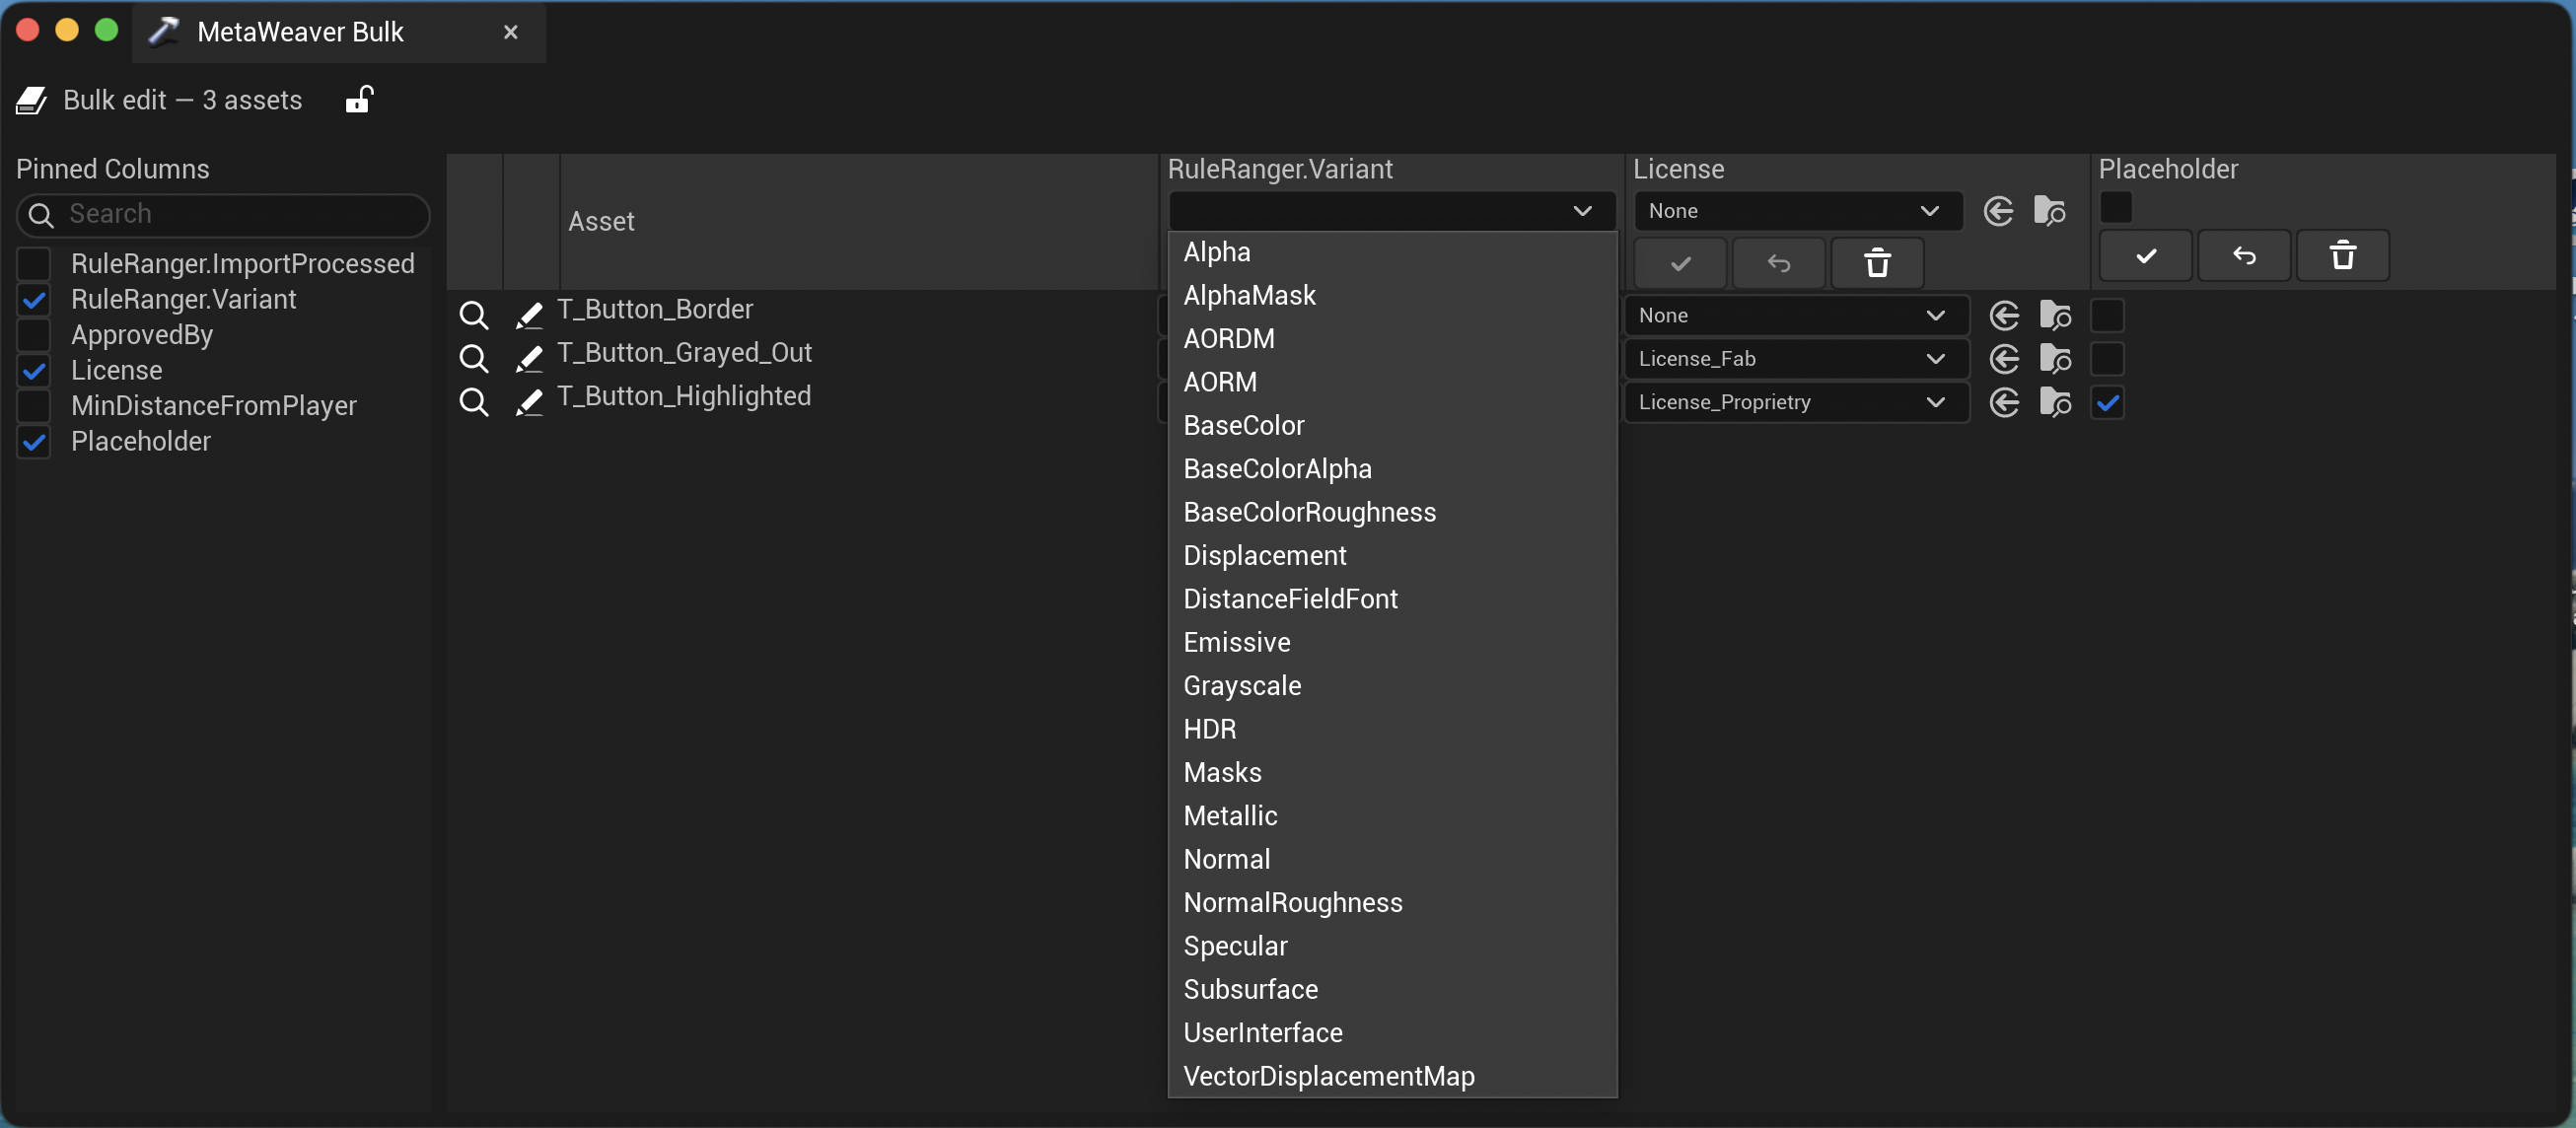
- Select multiple assets in the Content Browser → Asset Actions → Bulk Edit Metadata…
- Enable columns for keys you want to view/edit. Apply/Reset/Remove per column.
- Row actions include Show in Content Browser and Open Asset Editor.
Validation API
Other editor modules can validate assets via the validation subsystem:
if (GEditor)
{
    if (auto Subsystem = GEditor->GetEditorSubsystem<UMetaWeaverValidationSubsystem>())
    {
        const auto Report = Subsystem->ValidateAsset(Asset);
        // Inspect Report.Issues …
    }
}
Next Steps
- See Validation for enum/exclusive list semantics and error reporting.
- See FAQ for common questions and troubleshooting.